Importing OBJ Models with VTS-Browser-JS
This tutorial provides a step by step guide how to import and visualize sample OBJ models with VTS-Browser-JS.
In detail we’ll take a look how to display the VTS browser on a webpage. Next we’ll load some OBJ data and display them.
You can find the code and a live demo of this tutorial on JSFiddle.
OBJ File format
OBJ (or .OBJ) is a geometry definition file format first developed by Wavefront Technologies for its Advanced Visualizer animation package. The file format is open and has been adopted by other 3D graphics application vendors. More about obj file format can be found here.
We have tested our importer on the models exported from Blender and SketchUp. You should get good results with these programs. Keep in mind that models should be exported with triangulated polygons and in case you are using double side materials enable this option in your exporter (e.g. SketchUp).
VTS Browser JS
In case you already know to display map with VTS Browser JS you can skip flowing lines and continue with the OBJ part of the code.
The VTS Browser JS is a JavaScript WebGL rendering engine used and developed by Melown Technologies SE as part of the VTS 3D Geospatial Software Stack.
Embedding the browser
To embed the VTS Browser into a webpage, add the necessary CSS and
JavaScript resources and create a div with an id like map-div.
<!DOCTYPE html>
<html lang="en">
  <head>
      <link rel="stylesheet" href="https://cdn.melown.com/libs/vtsjs/browser/v2/vts-browser.min.css"/>
      <script src="https://cdn.melown.com/libs/vtsjs/browser/v2/vts-browser.min.js"></script>
  </head>
  <body>
     <div id="map-div" style="width:100%; height:100%;"></div>
     <script>
         <!-- add your js code here -->
     </script>
  </body>
</html>
Now that we’ve prepared our HTML structure we can add some JavaScript code to make the browser run.
var browser = null;
var renderer = null;
var map = null;

function startDemo() {
    browser = vts.browser('map-div', {
        map: 'https://cdn.melown.com/mario/store/melown2015/map-config/melown/VTS-Tutorial-map/mapConfig.json',
        position : [ 'obj', 15.3775623,50.675077, 'float', 0.00, -231.22, -25.55, 0.00, 101.83, 55.00 ]
    });

    //check whether browser is supported
    if (!browser) {
        console.log('Your web browser does not support WebGL');
        return;
    }

    //callback once is map config loaded
    browser.on('map-loaded', onMapLoaded);
}

function onMapLoaded() {
  // obj loading here
}

startDemo();
We created a map in place of the map-div and set the map parameter to
point to a map configuration we prepared in Melown Cloud for this purpose. You
can create your own map in Melown Cloud. We
set the
position
to some nice place in the countryside. You can discover more about browser
configuration parameters in
documentation.
Once the map loads we can start with
importing a OBJ files. We achieve this by using the callback function
onMapLoaded and registering it to listen for the map-loaded event.
You should now see the following:
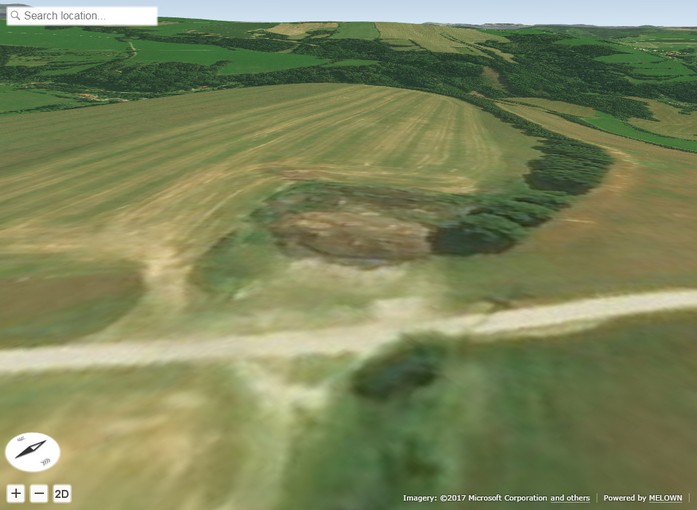
Initial image
Importing OBJ files
You need modelObj.js library for importing OBJ files. This library is part of the VTS Browser JS demos.
<script src="https://rawgithub.com/melowntech/vts-browser-js/master/demos/meshes-obj-import/modelObj.js"></script>
Let’s assume we have one OBJ file containing house and one OBJ file containing car. We place following lines in the onMapLoaded function.
map = browser.map;
renderer = browser.renderer;

carModel = new ModelOBJ(map, renderer, { path:'https://raw.githubusercontent.com/Melown/vts-browser-js/master/demos/meshes-obj-import/models/car-alpine/alpine.obj' });
houseModel = new ModelOBJ(map, renderer, { path:'https://raw.githubusercontent.com/Melown/vts-browser-js/master/demos/meshes-obj-import/models/modern-house/house.obj' });
The map, renderer, carModel, houseModel are global variables, sow we can use them later.
The ModelOBJ(map, renderer, options) object loads OBJ file from provided path parameter.
There are other supported parameters:
| Parameter | Default | Description |
|---|---|---|
| optimize | true | Sets whether meshes with the same material are rendered together |
| for better performance | ||
| textureFilter | trilinear | Sets filter used for textures. Defaul value is trilinear. |
Other possible values are: linear, nearest. |
||
| fastTessellation | false | This option can be enabled when you are sure, that model contains |
| only convex polygons with maximum number of 4 vertices. | ||
| onLoaded | null | Callback when model is loaded. |
How to setup rendering callback
We have to setup rendering callback for rendering custom models into the map. For that case we add following lines into the onMapLoaded function.
map.addRenderSlot('custom-models', onDrawModels, true);
map.moveRenderSlotAfter('after-map-render', 'custom-models');
First line adds new render slot with custom-models id which will call onDrawModels function when rendering the map.
The second line tells that custom-models callback will be called after the map is rendered. You can read more
about render slots in the documentation.
Rendering model
Rendering models is easy. Just add these line to the onDrawModels function:
function onDrawModels(renderChannel) {
    if (renderChannel != 'base') {
        return; //draw only in base channel
    }

    //draw models when all model resources are ready
    if (houseModel && houseModel.ready) {
        houseModel.draw({
            navCoords: [15.3772953, 50.6752052, 13.5],
            heightMode: 'float',
            rotation: [0,0,0],
            scale: [0.001, 0.001, 0.001],
            ambientLight: [90,90,90]

            //other possible value are:
            //depthOffset: [-50,0,0]   //when you need some zbuffer tolerance
                                       // you will probably only need to change first
                                       // value in the array
            //depthOnly: true          //for hit test implementation
        });
    }

    if (carModel && carModel.ready) {
        carModel.draw({
            navCoords: [15.3771059, 50.6752981, 12.5],
            heightMode: 'float',
            rotation: [0,0,0],
            scale: [1, 1, 1],
            ambientLight: [90,90,90]
        });
    }
}
First lines check whether we are rendering base channel. The base channel
means that we are rendering color channel. There can be other channels like
depth so we have to check that we are rendering in to the right channel.
Next line is testing that houseModel exists and whether it is ready (all textures
are loaded). When conditions are met, we draw the model. The draw function can
have following parameters:
| Parameter | Default | Description |
|---|---|---|
| navCoords | null | world coorinates + height of model origin, |
| in most cases [long, lat, height] | ||
| heightMode | float | heigth mode, posible values are ‘float’ (height above terrain), |
| ‘fix’ (absolute height) | ||
| rotation | [0,0,0] | euler angles [yaw, pitch, roll] about model origin |
| scale | [1,1,1] | [scaleX, scaleY, scaleZ] |
| ambientLight | [90,90,90] | ambient light color [red, green, blue] |
| depthOnly | false | for the hit test implementation, when the ‘depth’ channel is |
| rendered | ||
| depthOffset | [0,0,0] | [globalFactor, distanceFactor, tiltFactor] when you need some |
| zbuffer tolerance, you will probably only need to change first | ||
| value in the array |
Note that you can change the model position, rotation and scale in every rendered frame, so you can also animate models as you like.
That’s it for now, you’ve made it to the end :)
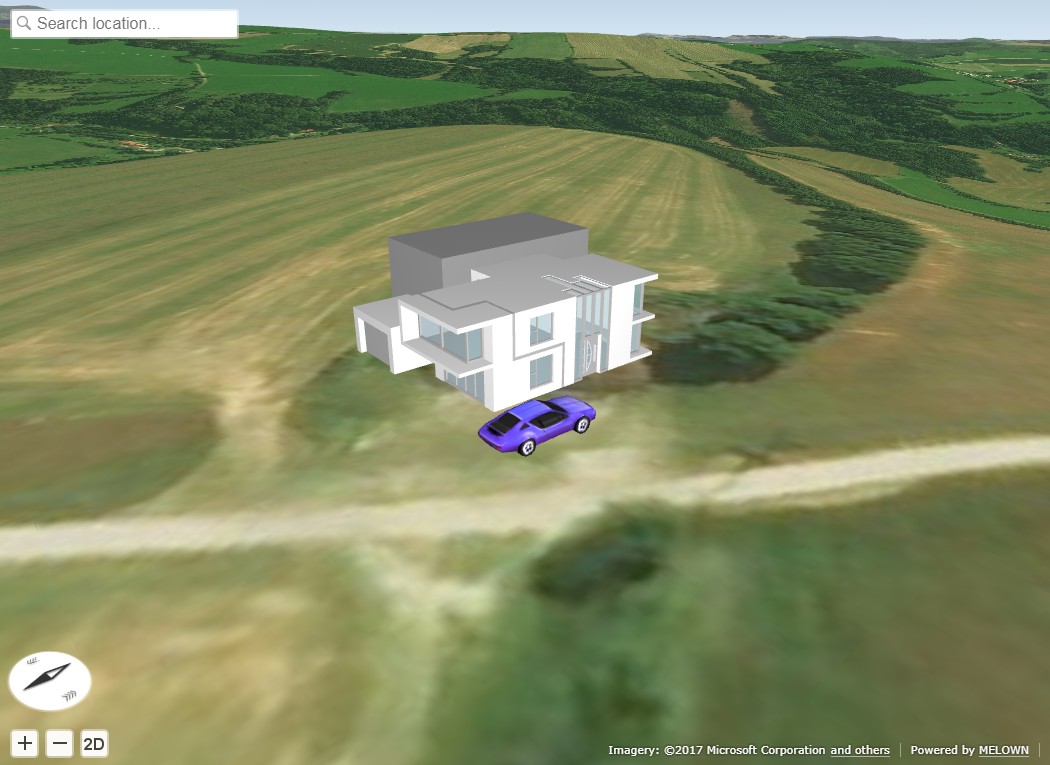
The resulting map.
You can check live demo on JSFiddle.